How I Teach Archery to Youth
 NASP sounds like it has to do with outer space. At least that’s what I thought the first time I heard the acronym. NASP––National Archery in the Schools Program––has certifiably nothing to do with space, but gives kids the same kind of rush.
When asked if I’d like to become a certified teacher for our school, I rolled my eyes. I couldn’t shoot the side of a barn with both eyes open using binoculars! Do I want to teach children? With pointed tips? Weapons? I laughed and said, “Sign me up!”
One day in January, about four years ago, six of us (including one of my sons) headed to a nearby town for a 2-day archery training in both 4-H and NASP. Our small reservation school had no equipment; however, if we became 4-H trained we could borrow 4-H equipment. And with a NASP grant we could put in for school matching funds. Which we did.
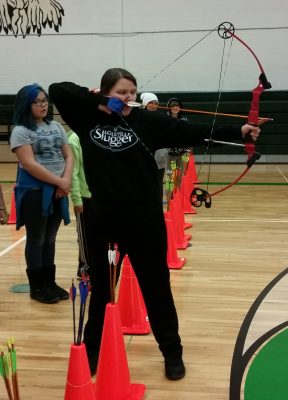
The training taught me I could shoot without binoculars and I was capable of teaching youth. Who knew? With NASP rules and regulations, our group began training sixth through twelfth graders. This year we’ve dropped down to grade four and they have hit the mark.
Our P.E. instructor at the school teaches them during class time beginning in January, and then we have afterschool clubs twice a week in February and March. This year we have two competitions instead of one: a local competition for grades four through seven and a second competition in the middle of the state at Central Washington University for grades eight through twelve. Both are state qualifying NASP competitions.
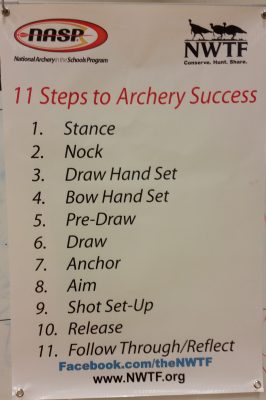
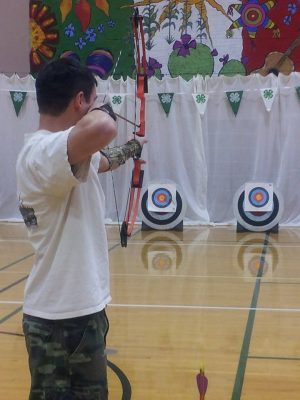
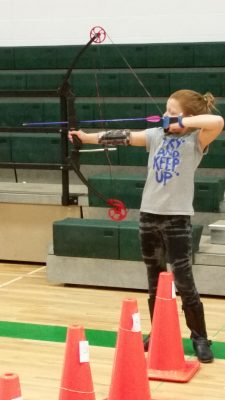
There are 11 steps to successful archery in the NASP program and when used with each shot, molds a masterful archer. They are:
- Stance—the archer straddles the shooting line with one foot on either side, with the inside toe a half step toward the target. The archers’ then place their bow on the inside toe to prove they are ready to shoot.
- Nock—the nocked end of the arrow is inserted into the bow string with the draw hand.
- Draw hand set—three fingers grip the bow string with the pads or the first joint of the fingers.
- Bow hand set—the archer places the bow in the bow hand with the meaty part of the thumb inside the grip to the lifeline of the palm.
- Pre-Draw—the archer lifts her arm allowing it to hinge at his shoulder so the shoulders remain level.
- Draw—smoothly pull or draw the string toward the right side of the archer’s face.
- Anchor—the index finger rests at the corner of the archer’s mouth.
- Aim—when the archer focuses on the target with the dominate eye.
- Shot set-up—the archer presses her shoulder blades together, transferring energy from arms to back, chest out.
- Release—when the archer relaxes her fingers and back of hand from the string, releasing the arrow.
- Follow-Through/Reflect—upon release, the draw hand moves rearward, along the face and under the ear with fingers relaxed and reflects on the upon the position of the draw and bow hand to see that they are in the proper ending position.
I invite you to visit my Youtube channel and watch one of our students perform these steps.
These steps are carried out both ten meters and fifteen meters from the targets both in practice and in competition.
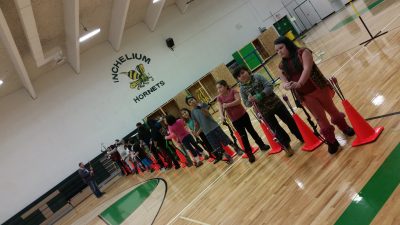
For instruction and safety we use whistle signals: 2 blasts = archers get your bows; 1 blast = archers shoot (normally five arrows at a time); 3 blasts = retrieve your arrows from the target; 5 blasts or more = stop immediately, place bows in bow racks, and walk to the waiting line as there is danger.
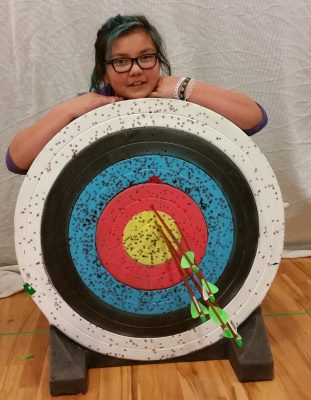
The growth I’ve seen in our students has been tremendous. Confidence has soared, arms and core body strengthened, and kids are happy being involved in an individualized sport they can constantly improve upon.
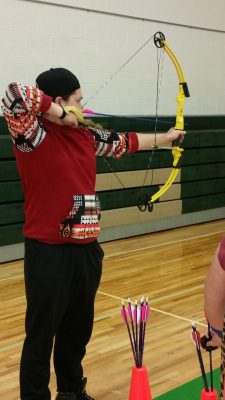
Because most of our students are Native American, they hunt as part of their culture. They can now take these skills and put them to use in traditional customs.
This is another way to unplug for an indoor winter activity or outdoor activity with family and friends.
~Happy trails. And remember to gallop into adventure.
This post is a “keeper” for me. I have a bow and arrow scene in my first SS that anchors my WIP. The “nocked” step I had correct, but had no idea the process of aiming and shooting was so formal and detailed. Thank you.
Perfect, Judith. Email me if you have further questions for your WIP.
Good luck with the Central Washington University competition. Keep us posted on the outcome!
Thank you, Gaby. I will!
Neat article how you came to teach archery to kids, Carmen. Good for you! I loved archery when I was in school, but nowadays I’m not able to even pick up a bow off the rack at the sports store! Loved your “binoculars” analogy…
Thank you, Alice. This Friday we take kids to Central Washington University for the state competition. We are taking grades 8-12. Should be fun!I love to shoot, but don’t get enough time doing it. I need to make more time.
What a great opportunity to relate to kids, Carmen. I’ll bet you are really appreciated. My oldest son and his son hunt with bow and arrow. My grandson got his first deer when he was 12. I tried out his bow and I couldn’t even bring it into position!
I love it, Mary! I know I cannot pull back my son’s bows and certainly not my husbands. I have my own bow that suits my strength and it’s a woman’s bow. I bet your grandson was super excited. Tell him congratulations! There is something said about those who bow hunt. What a skill!